
 Chinese
LED light strips, with their soft light, diverse installation scenarios and flexible dimming functions, have become the preferred lighting fixtures for home decoration, commercial lighting and landscape decoration. However, many users encounter the problem of flickering when using the dimming function. Many users believe that “slight flickering does not affect usage”, but they fail to consider the potential risks: Firstly, it affects the visual experience, especially in places such as bedrooms, study rooms, and commercial displays where light stability is highly demanded. Flickering can cause visual fatigue, headaches, and even accelerate the development of children’s myopia when exposed to low-frequency flickering for a long time. There are also a series of other problems.
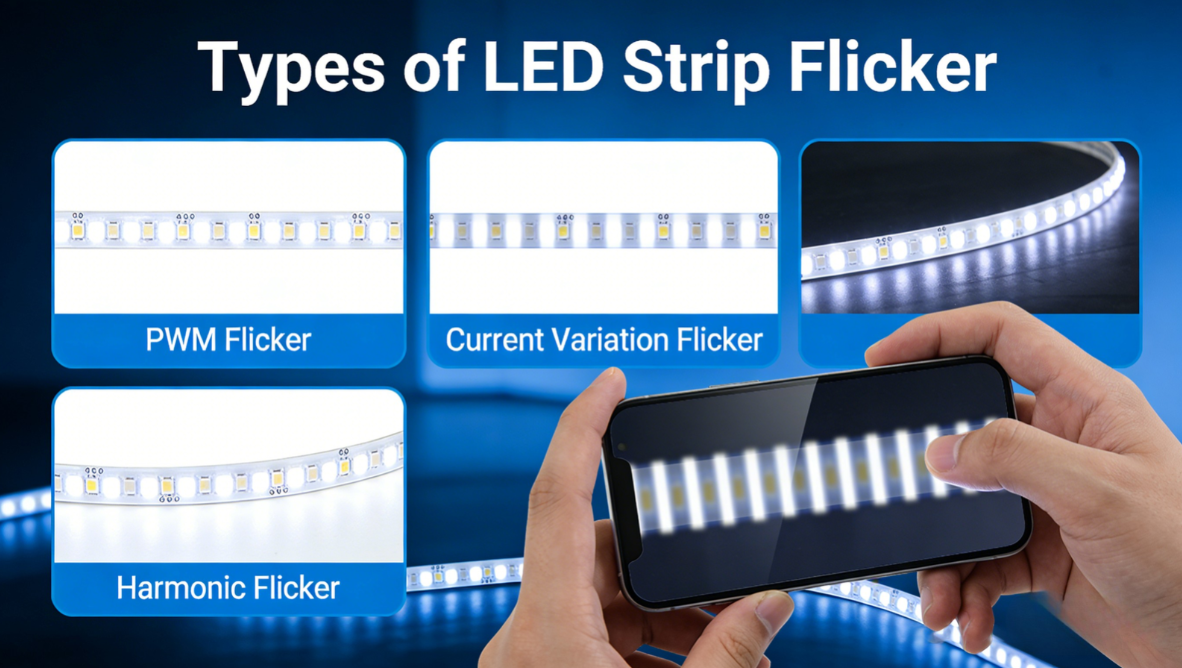
1 Most Common: Dimmer and Light Strip Incompatibility (60% of Cases)
This is the #1 cause I see—hands down. LED strips aren’t like old incandescent bulbs; you can’t just turn down the voltage to dim them. They need precise current control and signal transmission. If your dimmer and strip don’t “speak the same language,” flicker is a given. Let’s keep this simple—here’s what to check:
- Wrong Dimmer Type: Not suitable for dimmers for LED light strips. Also, different strips (like RGBW or addressable ones) use different dimming “codes”—mixing dimmers from different types will mess everything up. For example, a 5V WS2812B strip needs a specific 800kHz signal, while a 12V DMX strip needs its own—they won’t work together.
- PWM Frequency Mismatch: Most good LED controllers have a PWM frequency between 200-1000Hz—your eyes can’t see flicker above 200Hz. But cheap dimmers and strips? Their frequency is usually only 120-180Hz. When you turn the brightness down, that flicker becomes visible—and it’s annoying. Just upgrading to a better dimmer fixes this.
- Load Mismatch: Every dimmer has a “sweet spot” for how much power it can handle. If your strips use less power than the dimmer’s minimum (common with old thyristor dimmers) or more than its maximum, you’ll get flicker. It’s like trying to run a small light bulb on a dimmer made for a big chandelier—doesn’t work right.
2 Easy to Miss: Faulty Power Supply
Think of the power supply as the “heart” of your LED strip—if it’s weak or faulty, everything goes wrong. I’ve seen so many customers overlook this, but it’s a simple fix once you know what to look for. Here are the most common power supply issues I run into:
- Poor Quality Power Supply: Cheap power supplies cut corners—they don’t have enough capacitors to filter the current properly. That means the DC power they put out has a lot of “ripple” (tiny AC current mixed in). When you dim the strip, the current changes fast, causing a voltage drop—and flicker. I’ve tested cheap 12V power supplies where this ripple is 10% of the rated voltage—that’s way too much, and it’s easy to fix by upgrading to a quality power supply.
- Insufficient voltage or power: The output voltage of the power supply must be the same as that of the light strip, and the power must be 30% higher than the total power of the light strip. Only in this way can there be sufficient power to drive the light strip.
- Power supply aging or overheating: If the power supply is used for an excessively long time, the internal components will age, and the output current will become unstable, which may cause the light strips to flicker intermittently.
3 Easiest to Fix: Bad Wiring or Loose Connections
When you are making DIY light strips, often due to improper wiring or connection, the light strips will flicker.
- Poor wiring: The connections between the light strips and the power supply, as well as the dimmer, were not properly made, resulting in intermittent current supply and flickering.
- Reversing the positive and negative terminals: This will cause flickering during dimming, abnormal brightness, and even failure to dim normally
- Connection method error: When multiple light strips are connected in series, parallel connection was not used, resulting in uneven current distribution.
- Contact point oxidation: After prolonged use, the interface of the light strip oxidizes and turns black, resulting in unstable current transmission and flickering of the light strip.
4 Other Causes: The Strip Itself or Environmental Interference
- Poor Quality Light Strip: Cheap strips use low-grade LED beads and shoddy soldering. The beads can wear out or fall off, or the strip doesn’t dissipate heat well. When you dim it, the temperature goes up, and the strip shuts off temporarily—causing flicker. Some cheap strips even have design flaws that make them impossible to dim without flicker. If this is the case, replacing the strip to a flicker free strip.
-Electromagnetic interference: When the air conditioner, refrigerator, or microwave oven is turned on or off, it will generate electromagnetic interference, which will affect the PWM signal and cause the light strips to flicker.
- Poor heat dissipation: The light strips were installed in a confined space without proper heat dissipation measures. During dimming, changes in power led to an increase in temperature, causing abnormal operation of the light beads and the driver chip. As a result, the light strips would flicker.
Regarding the situation where the display is flickering, here are some solutions to address it.
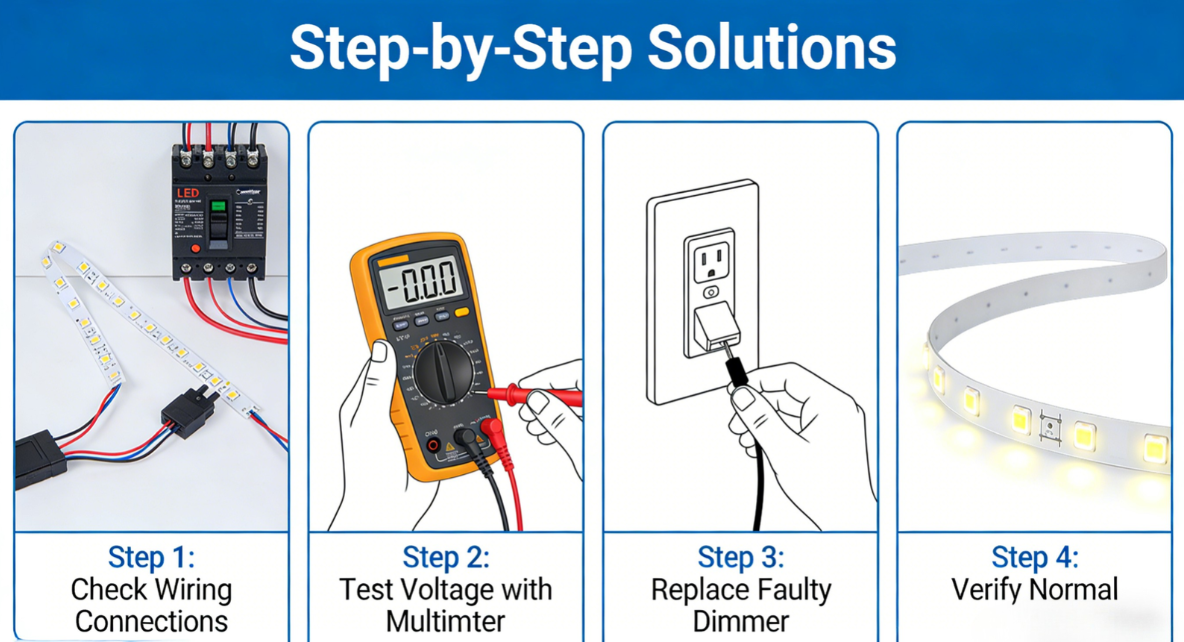
Step 1: Check the Wiring
This is the first step I take with every customer—it’s easy, costs nothing, and fixes most simple flicker problems. Here’s what to do:
1. Power-off: Remove the power plug to avoid the risk of electric shock.
2.Check the positive and negative poles: Ensure that the positive and negative poles of the light strips, dimmers, and power supply are connected correctly. If they are connected in the wrong way, adjust the wiring direction and re-test.
3. Tightening connections: Check if all connections are secure; if there is oxidation at the connection points, wipe them clean with alcohol.
4. Check the wiring method: When multiple light strips are connected in parallel, use parallel wiring to avoid series connection.
After the inspection, perform an on-site power-on test. If the light strip stops flashing, it indicates that the problem lies in the wiring; if it is still flashing, further troubleshooting is required.
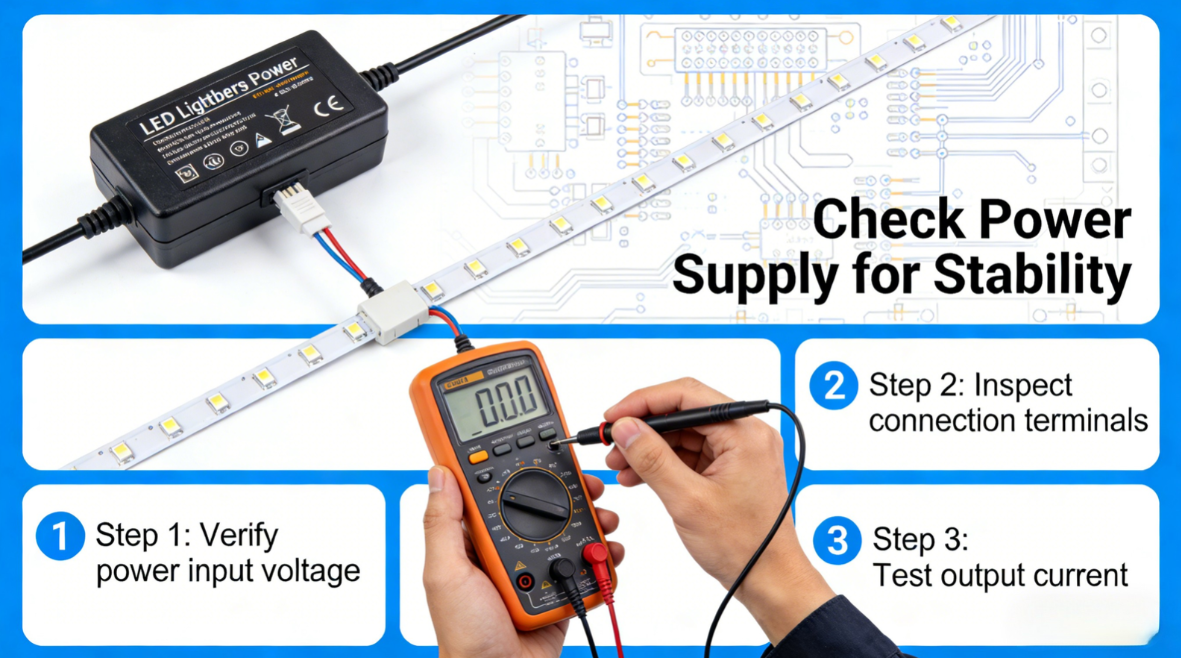
Step 2: Check the Power Supply
1. Check power parameters: Ensure that the output voltage and power of the power supply match the requirements of the light strip. The power of the power supply should be more than 1.2 times the total power of the light strip to avoid insufficient load.
2.Power supply replacement test: If there is any suspicion of power supply quality issues, replace it with a power supply of the same specification and conduct the power-on dimming test.
3. Check for voltage fluctuations: Observe whether the flickering occurs simultaneously with the start and stop of high-power electrical appliances. If it does, a voltage stabilizer can be installed at the power input end.
Step 3: Check if the dimming equipment is the right choice
If the wiring and power supply are fine, then the problem is likely that the dimming device is incompatible with the LED strip. You can try the following solutions: Confirm the LED strip’s dimming type: Check if the LED strip is monochrome, RGB, or RGBW.
These are just simple solutions. If you encounter more complex problems related to LED light strips, please feel free to contact us.
Facebook:https://www.facebook.com/profile.php?id=100089993887545
Instagram:https://www.instagram.com/mx.lighting.factory/
YouTube:https://www.youtube.com/channel/UCMGxjM8gU0IOchPdYJ9Qt_w/featured
LinkedIn:https://www.linkedin.com/company/mingxue/
Post time: Mar-31-2026