
 Chinese
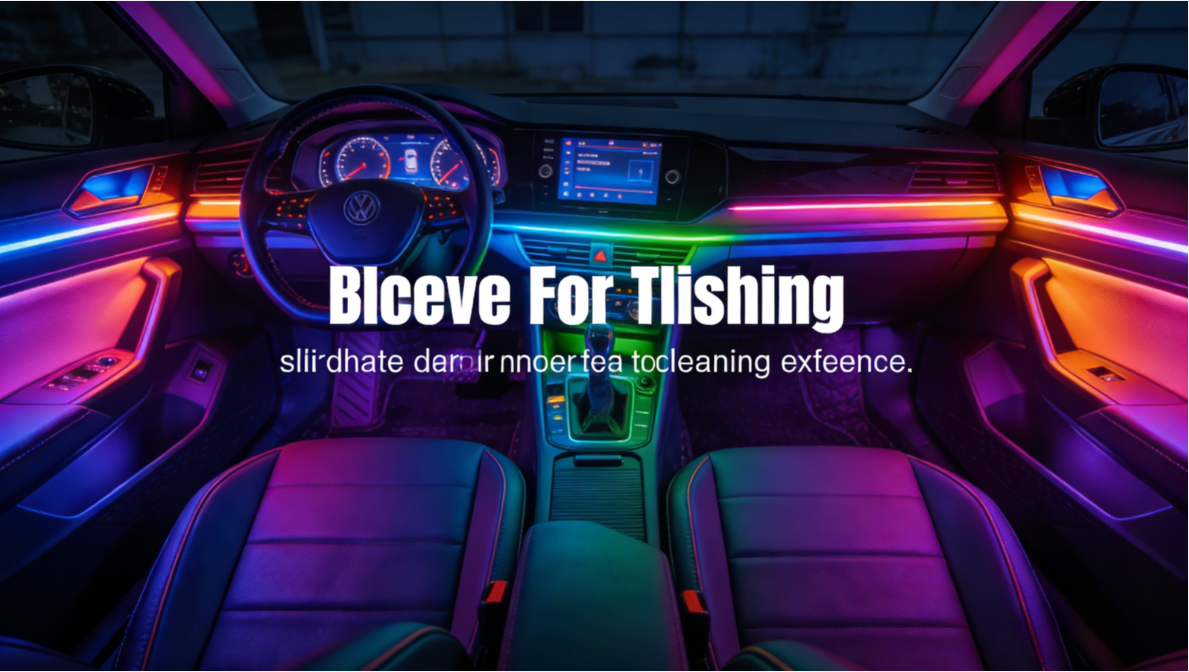
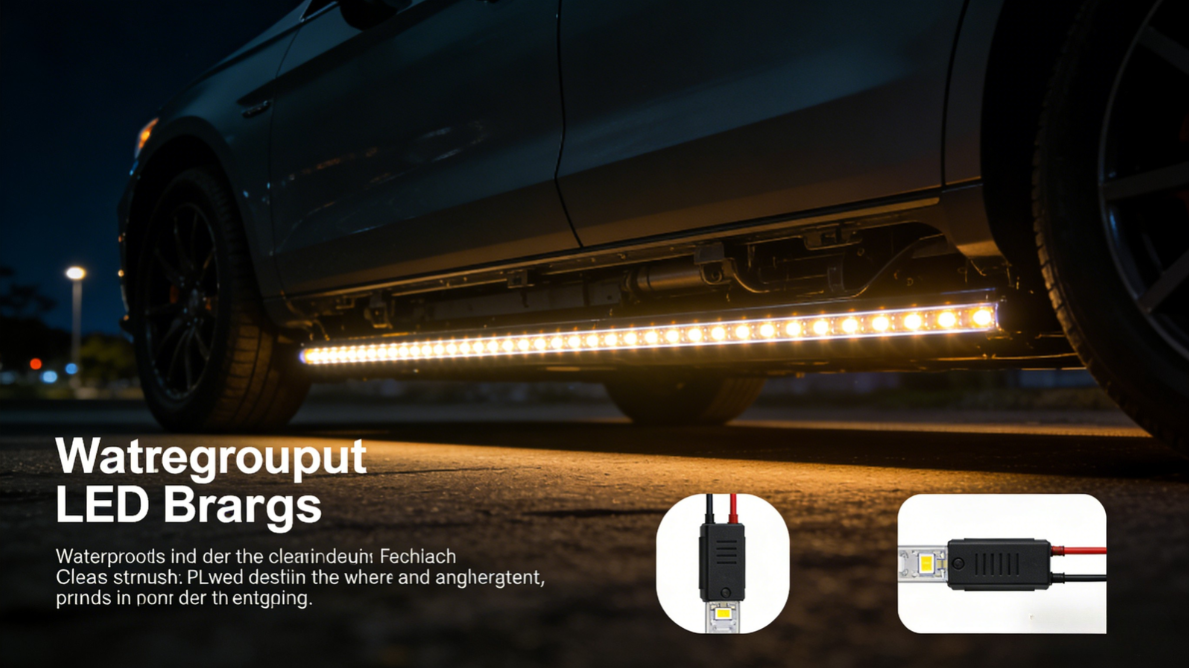
With the rise of the trend of personalized car modifications, LED light strips have emerged as the preferred choice for many car owners to enhance the appearance and atmosphere of their vehicles. Among them, the interior ambient lights can create a unique cabin style, and the chassis lights can make the vehicle highly recognizable at night. However, the automotive electrical system is complex, and modifications must take into account aesthetics, safety, and compliance.
This article will provide you with a comprehensive guide to car LED light strip modifications from aspects such as selection, installation steps, and key precautions, to help you upgrade your personalized vehicle safely.
I. Preparations before modification: Model selection and tool preparation
1.1 Key Points for Selecting Automotive LED Light Strips
●Select based on installation scenarios: For interior ambient lighting, flexible light strips are preferred (suitable for curved positions such as the center console, door panels, and foot wells), and a waterproof rating of IP44 or higher is recommended (to cope with the humid environment inside the vehicle); for chassis lights, high waterproof rating light strips (IP67 or higher, capable of resisting rain and sand erosion) should be selected, and materials resistant to high and low temperatures should be prioritized (to adapt to extreme outdoor conditions).
●Core parameter selection: The voltage must match the vehicle’s electrical system (most cars use 12V, to avoid short circuits caused by high-voltage light strips); the brightness should be adjusted according to the purpose (the interior ambient lights are recommended to be 300-500 lumens to avoid glare; the chassis lights can be selected from 500-800 lumens to ensure night visibility); the color temperature and color can be chosen as needed (commonly used warm light in the interior is 3000K-4000K, cold light is 6000K-8000K, and RGB color adjustment is supported for more individuality); the light strip chips are preferably from well-known brands (such as SMD5050, SMD2835, which have uniform light emission and longer lifespan, avoiding rapid degradation of inferior chips).
●Additional feature considerations: The interior ambient lights can be selected in models with remote control and APP control (supporting brightness, color, and breathing mode adjustments); the chassis lights are recommended to be chosen with strobe and gradient modes, but it is necessary to ensure compliance with local regulations to avoid violations.
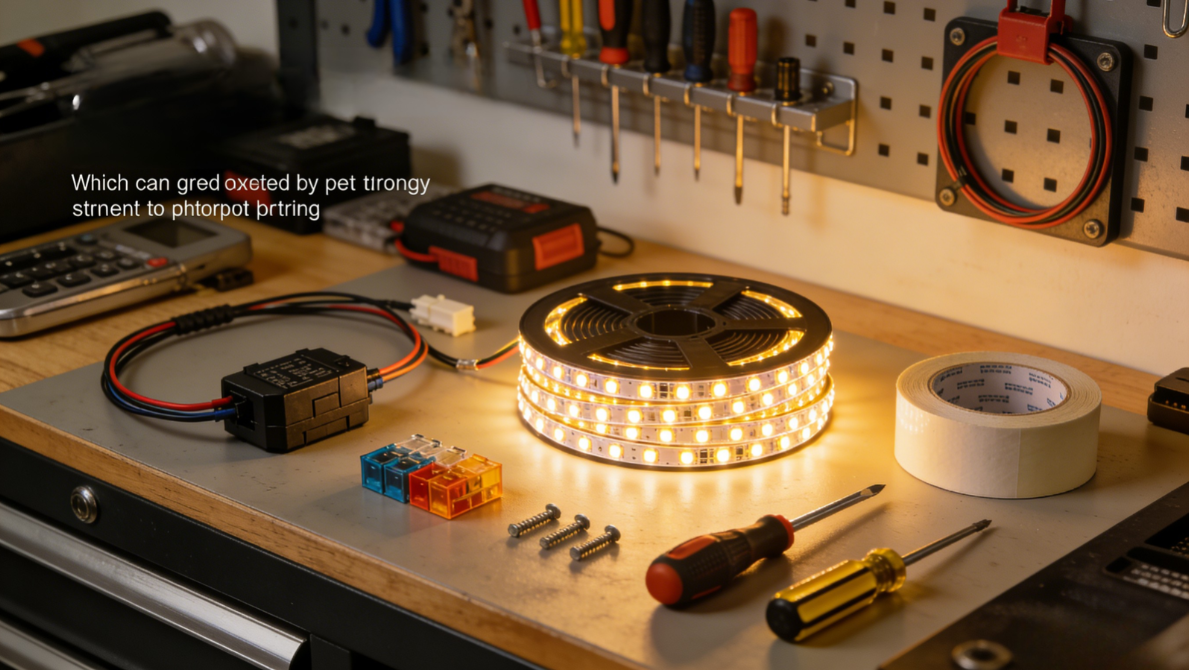
1.2 Essential Tools and Supplementary Components
●- Basic installation tools: Electrical tape, cable ties, wire strippers, screwdrivers (cross/straight),multimeter (for measuring circuit voltage and checking continuity), scissors (for cutting flexible light strips, follow the marking instructions for cutting).
●Core auxiliary components: Relay (protects the original vehicle’s circuitry and prevents the excessive current of the light strip from burning the wiring); Fuse (matched according to the power of the light strip, recommended 5-10A to prevent short circuits and fires); Fixed clips/back adhesive (select automotive-specific high-temperature back adhesive to avoid detachment during long-term use; the chassis lights need to be reinforced with metal clips); Waterproof connector (essential for chassis lights installation to prevent rainwater from seeping into the interface).
1.3 Preliminary Inspection and Planning
●Check the original vehicle’s electrical system (use a multimeter to measure the battery voltage and the continuity of the wiring, ensuring there are no aged or damaged lines to prevent potential malfunctions after modification).
●Plan the installation path of the light strips (The interior ambient lights should avoid key areas such as airbags and seat slides; the chassis lights should be arranged along the edge of the frame, avoiding exhaust pipes, braking systems and other high-temperature and moving parts).
●Confirm the local regulations for vehicle modifications (in some areas, the dashboard lights are prohibited from being turned on at night to avoid penalties for violations; therefore, it is advisable to opt for the light strips that can switch between “driving mode” and “static mode” for better safety).
II. Step-by-step Installation Tutorial: Interior Ambient Lights + Chassis Lights
2.1 Installation of Interior Ambient Lighting (Taking the door panels and the center console as examples)
1-Clean the installation surfaces: Use alcohol cotton pads to wipe the inner side of the door panel, the edges of the control console, etc., to remove dust and oil stains, ensuring that the self-adhesive is firmly attached and preventing it from peeling off later.
2-Cutting and Fixing the Light Strip: According to the installation length, cut the light strip at the marking points for each 3-5 light bulbs (it is prohibited to cut at non-marked areas, as this will cause the light strip to short-circuit). Remove the back adhesive and attach the light strip to the installation position. Use zip ties or clips for auxiliary fixation (focus on fixing the ends of the light strip and the turning points to prevent displacement due to vehicle vibration).
3-Line layout and concealment: The light strip lines are arranged along the interior panel of the door and the gap of the center console. They avoid the area where the airbags will deploy. The excess parts of the lines are wound and sorted, and fixed with cable ties to prevent them from being exposed and affecting the appearance or being crushed and damaged.
4-Circuit connection (core step): Preferably choose the ACC power supply (it is powered on when the vehicle starts and turns off when it is off, avoiding the consumption of the battery’s power). Use wire strippers to remove the insulation layer of the ACC lines, connect the positive and negative lines of the light strip correspondingly (red wire for the positive pole, black wire for the negative pole), wrap the connection point with electrical tape for protection, and then cover it with heat shrink tubing (to prevent short circuits and poor contact); At the same time, connect an insurance fuse (near the power interface position, facilitating later fault detection), if the light strip has a large power, a relay needs to be installed to protect the original vehicle circuit.
5-Testing and Debugging: Start the vehicle, turn on the ambient light switch, check if the light strips are emitting light normally and if the color adjustment is smooth. If there are no abnormalities, tidy up the wiring, install the interior panels, and complete the installation.
2.2 Installation of Underbody Lights (Special Protection + Secure Fixation)
1. Positioning and Fixing of Light Rails: Raise the vehicle (using a professional lifting machine or jack, along with a support frame for stabilization, to ensure construction safety), mark the installation positions along the edge of the chassis frame, avoiding exhaust pipes (high temperature can easily damage the light rails), brake oil pipes, transmission shafts and other moving and high-temperature components. Use metal clips to fix the light rails on the frame (fix one every 30cm, and additional reinforcement is required at both ends of the chassis lights to withstand bumpy road conditions).
2. Waterproofing treatment: Apply waterproof glue at the interface of the light strip, then attach a waterproof connector, and wrap electrical tape around it to ensure a complete seal. If there is exposed metal at the cut-off part of the light strip, use a waterproof cap to seal it to prevent water, mud, and sand from seeping in and causing a short circuit.
3. Line Layout and Protection: The lines are arranged along the gap of the chassis frame and are fixed with cable ties. The lines are covered with corrugated pipes (to resist stone impacts and wear), and to avoid contact with sharp components; when the lines enter the vehicle from the chassis, they need to pass through the pre-reserved holes in the original vehicle (if drilling is required, it should avoid areas such as the fuel tank and oil pipes, and after drilling, a waterproof sealing ring should be installed).
4. Circuit connection: In the same way as the interior ambient lights, the ACC power supply should be connected first. Then, connect the fuse and relay in series. The positive and negative terminals should be properly connected. Ensure that the connection points are waterproof and insulated to guarantee stable operation in outdoor humid environments.
5. Testing and Acceptance: Lower the vehicle, turn on the power supply, check if the chassis lights are emitting light normally and if the mode switching is smooth. Test the brightness and angle of the lights at night to ensure they do not affect the movement of oncoming vehicles. Check for any looseness or exposure issues in the wiring. Complete the installation.
III. Key Points to Note: Safety, Compliance, Durability
3.1 Key Points of Safety Protection (Preventing Circuit Failures and Safety Risks)
●Circuit connection prohibitions: It is strictly forbidden to directly connect the light strip circuit to the positive and negative terminals of the battery (without ACC control, it will continuously consume power, leading to battery depletion); it is also prohibited to bypass fuses and relays (high-power light strips are prone to causing circuit overload, burning out the original vehicle’s circuit and even causing fire); the positive and negative terminals must not be connected in reverse (this will result in the light strip not lighting up and some controllers may be damaged).
●High-temperature and wear protection: The light strips should be kept at least 10 cm away from high-temperature components such as exhaust pipes and engines (to prevent aging and burning due to high temperatures); the wiring should avoid being squeezed by seat slide rails, door hinges, etc. Long-term friction may cause the insulation layer to be damaged, leading to short circuits.
●Construction Safety Regulations: When raising the vehicle using the chassis light lifting mechanism, a support must be used for fixation. It is strictly prohibited to support only with a jack (to prevent the vehicle from falling); Before connecting the wires, turn off the vehicle’s power supply and use a multimeter to test the circuits to avoid electric shock or circuit failures caused by live operation.
3.2 Compliance Requirements (Preventing Penalties for Violations)
●It is prohibited to install flashing or strobing light strips (in most areas, this is considered illegal and can easily interfere with the view of oncoming vehicles, potentially causing traffic accidents). The chassis lights are recommended to be turned on only during static displays and turned off during driving.
●Avoid using inappropriate lighting colors (in some areas, red and blue light strips are prohibited.These colors are easily confused with police lights, so it is necessary to check the local traffic regulations in advance). Opt for compliant colors such as white, yellow, and green instead.
●After modification, it must not affect the vehicle’s annual inspection (in some areas, the annual inspection is very strict and the exposed light strips may fail to pass the inspection. It is recommended to choose a style that can be quickly disassembled, so that it can be removed during the inspection).
3.3 Post-Maintenance and Durability Techniques
●Regularly inspect the wiring and fasteners (check once a month, especially for the chassis lights.Observe whether the wiring is worn out or the clips are loose, and promptly reinforce or replace any damaged components).
●Clean the surface of the light strips (wipe the dust off the interior ambient lights with a soft cloth, and use a high-pressure water gun to rinse the underside lights from the side. Avoid directly impacting the connectors to prevent waterproofing failure).
●Avoid leaving the lights on for long periods (turn off the light strips promptly after the vehicle is turned off to prevent draining the battery; when parking the vehicle for a long time, disconnect the power supply of the light strips to protect the battery and the light strips).
●Choose high-quality components (inferior light strips and controllers are prone to flickering, attenuation, short circuits and other problems. Opt for brand products and use them in combination with automotive-specific circuit accessories to extend their service life).
IV. Common Issues Investigation and Solutions
4.1 The light strips do not emit light.
Troubleshooting steps:
1. Circuit connection issues (reverse positive and negative terminals, poor contact at connectors, re-join the circuits, reinforce the connectors);
2. Fuse blowout (replace with corresponding specification fuse, check for short circuit in the circuits);
3. Faults in the light strips themselves (incorrect cutting position, damaged chips, replace the light strips and cut them according to specifications).
4.2 Fluctuating lights and unstable brightness
Troubleshooting directions:
1. Voltage instability (install relays to ensure stable power supply);
2. Poor line contact (re-wrap the connectors and reinforce with heat shrink tubing);
3. Controller failure (replace with a compatible controller to avoid insufficient power supply from the controller).
4.3 Light strips falling off, wiring worn out
Troubleshooting directions:
1. Aging of the adhesive (replace with automotive-specific high-temperature resistant adhesive,clean the installation surface and reapply);
2. Insecure fixation (add clips or cable ties for fixation, particularly strengthen the vibration areas);
3. Wear of the wiring (replace damaged wiring, cover with corrugated tubes for protection, avoid areas of compression and friction).
Modifying the LED light strips on a car can quickly enhance the personalized style of the vehicle.The interior ambient lights can create a unique cabin atmosphere. The chassis lights can make the vehicle stand out at night. However, the core principle of the modification is safety and compliance. When choosing the type, consider both compatibility and quality. During installation, strictly follow the circuit specifications, and ensure proper waterproofing, fixation, and insulation.Regular maintenance is also necessary in the future. Only by doing so can you enjoy the fun of personalized modification while ensuring driving safety. Selecting high-quality LED light strips and accessories, and combining with professional installation operations, will make your car stand out in both appearance and safety.
MX lighting has IATF16949 Certificated,we also have experience in manufacturing vehicle-mounted LED light strips.If you want to know what kinds of LED light strips can be used for car LED light strip modification and interior ambient light installation, as well as the precautions for LED light strip modification, please feel free to contact us.
Facebook:https://www.facebook.com/profile.php?id=100089993887545
Instagram:https://www.instagram.com/mx.lighting.factory/
YouTube:https://www.youtube.com/channel/UCMGxjM8gU0IOchPdYJ9Qt_w/featured
LinkedIn:https://www.linkedin.com/company/mingxue/
Post time: Jan-28-2026